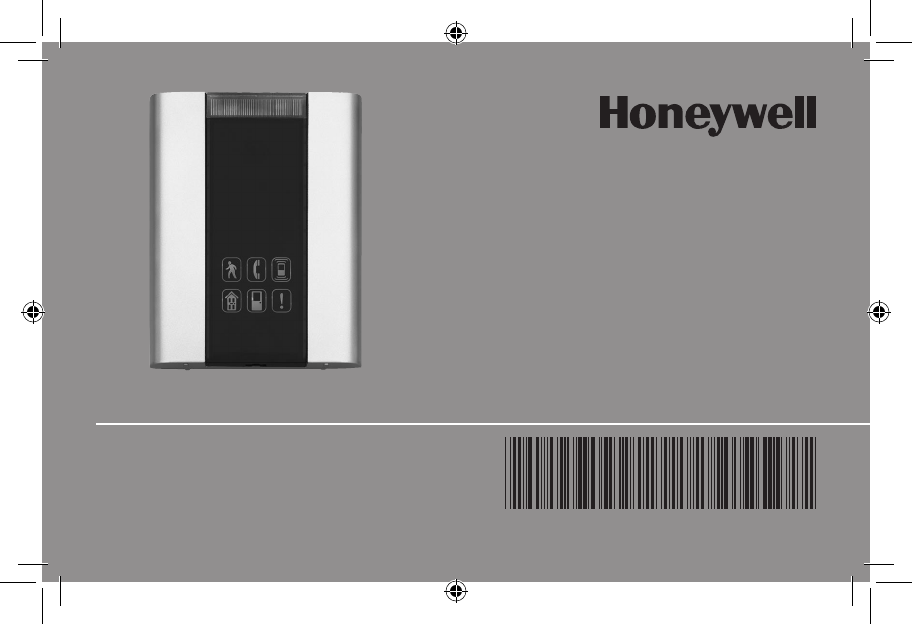
Honeywell RCWL330A User Manual
Browse online or download User Manual for Furniture Honeywell RCWL330A. Honeywell RCWL330A User Manual
- Page / 60
- Table of contents
- TROUBLESHOOTING
- BOOKMARKS
- RCWL330A (51459SL) 1
- Contents 2
- Open the Bell Push 5
- Sliding Window 8
- Shown with number 8
- Volume Control 9
- Use of Icons 10
- RCWL330A 11
- Installation Instructions 12
- Mount the Bell Push 14
- Troubleshooting 16
- Specifications 18
- Directives 21
- Table des matières 22
- Directives d’installation 24
- Ouvrir la sonnette 25
- Fenêtre coulissante 28
- Illustré avec bandes 28
- Utilisation des icônes 30
- Dépannage 36
- Caractéristiques techniques 38
- Instrucciones de 41
- Instalación 41
- Instrucciones de Instalación 42
- Ventanilla deslizante 48
- Se indica con bandas de 48
- Uso de los íconos 50
- Solución de problemas 56
- Especificaciones 58
Summary of Contents
Installation InstructionsRCWL330A (51459SL)P4 Premium Portable Plus Wireless Chime and Push69-2148EFS-0169-2148EFS_A.indd 1 3/20/2008 9:34:24 AM
Installation Instructions69-2148EFS—01 8Use of IconsIn addition to the chime sounds, your chime has a visual indication to show which device has acti
RCWL330A 9 69-2148EFS—01The “Main door” and “Back door” icons are usually used for bell pushes. The other icons are intended for use with other comp
Installation Instructions69-2148EFS—01 10Programming ProcedureLearn procedureTo enable your chime to learn the identity of your bell push:• Press th
RCWL330A 11 69-2148EFS—01Changing the TuneOperate the push. While the Icon is flashing, press the button. Press the button again and the tune wi
Installation Instructions69-2148EFS—01 12Mount the Bell PushMount using either the double-sided adhesive pad, or the screws pro-vided (see Fig 7).Tes
RCWL330A 13 69-2148EFS—01Chime PositionThe chime can be free-standing or wall-mounted using the wall bracket provided. If wall mounting is preferred
Installation Instructions69-2148EFS—01 14TroubleshootingA “beep” sound is heard in learn mode…• The push you are programming has already been learne
RCWL330A 15 69-2148EFS—01The chime does not sound…• Check the chime switch position.• Check that the volume control is not at the minimum setting.
Installation Instructions69-2148EFS—01 16Specification Chime Bell PushOperating Temperature 32°F to 104°F 0°C to +40°C14°F to 104°F -10°C to +40°CRan
RCWL330A 17 69-2148EFS—01Disposal & RecyclingBatteries and waste electrical products should not be disposed of with household waste. Please recy
Installation Instructions69-2148EFS—01 iiContentsChecking pack contents ...
Honeywell International Inc.ACS, Environmental and Combustion Controls1985 Douglas Drive, Golden Valley, MN 55422www.honeywell.com® U.S. Registered Tr
Directives d’installationRCWL330A (51459SL)Sonnette et carillon portatifs sans fil supérieurs Plus P4 69-2148EFS_A.indd 19 3/20/2008 9:55:20 AM
69-2148EFS—01 20Directives d’installationTable des matièresVérification du contenu de la boîte ...
RCWL330A 21 69-2148EFS—01Sonnette et carillon portatifs sans fil supérieurs PlusNous vous remercions d’avoir choisi un produit Honeywell. Veuillez s
69-2148EFS—01 22Directives d’installationSécuritéAvant de procéder à l’installation, veuillez prendre note des précautions suivantes :• Toujours sui
RCWL330A 23 69-2148EFS—01Ouvrir la sonnetteInsérez un tournevis à lame plate dans la fente A, à la base de la sonnette. Soulevez doucement le couver
69-2148EFS—01 24Directives d’installationInstallation du carillonPour enlever le couvercle du compartiment à piles du carillon, appuyez sur le point
RCWL330A 25 69-2148EFS—01Positions des interrupteursVoyant clignotant, sans son Pour que le voyant reste allumé sans faire entendre de son, placez l
69-2148EFS—01 26Directives d’installationFenêtre coulissanteLibérez le loquet (E) et faites glisser la fenêtre.M27271E23156Fig. 5Illustré avec bandes
RCWL330A 27 69-2148EFS—01Réglage du volumeLe bouton de réglage du volume est situé sous la fenêtre coulissante sur le devant du carillon. Pour comme
RCWL330A 1 69-2148EFS—01Premium Portable Plus Wirefree Chime with PushThank you for choosing this Honeywell product. Please use the following instru
69-2148EFS—01 28Directives d’installationUtilisation des icônesEn plus de déclencher une sonnerie, votre carillon identifie visuellement l’appareil q
RCWL330A 29 69-2148EFS—01Les icônes de porte d’entrée et de porte arrière sont généralement utilisées avec les sonnettes. Les autres icônes sont uti
69-2148EFS—01 30Directives d’installationProgrammationPour programmer les icônesPour permettre à votre carillon d’apprendre à identifier votre sonnet
RCWL330A 31 69-2148EFS—01Changer la sonnerieAppuyez sur la sonnette. Lorsque l’icône clignote, appuyez sur le bouton . Appuyez à nouveau sur ce bou
69-2148EFS—01 32Directives d’installationInstallation de la sonnetteInstallez la sonnette en utilisant le tampon adhésif ou les vis fournis (Voir Fig
RCWL330A 33 69-2148EFS—01Position du carillonLe carillon peut être fixé de façon autonome ou monté sur un mur en utilisant le support mural fourni.
69-2148EFS—01 34Directives d’installationDépannageJ’entends un bip sonore en mode de programmation…• La sonnette que l’on tente de programmer a déjà
RCWL330A 35 69-2148EFS—01Le carillon ne sonne pas...• Vérifiez la position de l’interrupteur du carillon.• Vérifiez que le volume n’est pas réglé
69-2148EFS—01 36Directives d’installationCaractéristiques techniquesCarillon SonnetteTempérature de service 32 °F à 104 °F 0 °C à +40 °C 14 °F à 104
RCWL330A 37 69-2148EFS—01Mise au rebut et recyclageLes piles et les produits électriques ne doivent pas être mis au rebut avec les ordures ménagères
Installation Instructions69-2148EFS—01 2SafetyBefore proceeding with the installation, please note the following safety warnings:• Always follow the
Honeywell International Inc.SRA, Régulateurs d’ambiance et de combustion1985 Douglas Drive, Golden Valley, MN 55422www.honeywell.com® Marque enregistr
Instrucciones de InstalaciónRCWL330A (51459SL)Campanilla y pulsador inalámbricos y portátiles Plus de primera P469-2148EFS_A.indd 39 3/20/2008 9:3
69-2148EFS—01 40Instrucciones de InstalaciónÍndiceVerificación del contenido del paquete ...
41 69-2148EFS—01RCWL330ACampanilla sin cables portátil Plus de primera con pulsadorGracias por elegir este producto Honeywell. Utilice las siguient
69-2148EFS—01 42Instrucciones de InstalaciónSeguridadAntes de proceder con la instalación, observe las siguientes advertencias de seguridad:• Siempr
43 69-2148EFS—01RCWL330AAbra el pulsador del timbre Inserte un destornillador de hoja plana en la ranura A, en la base del pulsador. Cuidadosamente
69-2148EFS—01 44Instrucciones de InstalaciónInstale las baterías de la campanilla.Para retirar la cubierta de la batería de la campanilla, presione e
45 69-2148EFS—01RCWL330APosiciones del interruptorModo silencioso con destello on “encendido” Para que el destello permanezca encendido y el sonido
69-2148EFS—01 46Instrucciones de InstalaciónVentanilla deslizanteLibere el enganche (E) y deslice la ventanilla para abrirla.M27271E23156Fig. 5Se ind
47 69-2148EFS—01RCWL330AControl de volumenEl control de volumen está detrás de la ventanilla deslizante al frente de la campanilla. Inicialmente, c
RCWL330A 3 69-2148EFS—01Open the Bell PushInsert a flat-bladed screwdriver into the slot A, at the base of the push.Carefully lever the cover and ba
69-2148EFS—01 48Instrucciones de InstalaciónUso de los íconosAdemás de los sonidos, la campanilla tiene una indicación visual para mostrar el dis-pos
49 69-2148EFS—01RCWL330ALos íconos de “Puerta principal” y “Puerta trasera” se utilizan generalmente para pulsadores de timbre. Los otros íconos se
69-2148EFS—01 50Instrucciones de InstalaciónProcedimiento de programaciónProcedimiento de memorizaciónPara permitir que la campanilla memorice la ide
51 69-2148EFS—01RCWL330ACómo cambiar la melodía Accione el pulsador. Mientras el ícono esté destellando, presione el botón . Presione el botón n
69-2148EFS—01 52Instrucciones de InstalaciónInstalación del pulsador del timbreInstálelo con la almohadilla adhesiva de doble lado o los tornillos qu
53 69-2148EFS—01RCWL330APosición de la campanillaLa campanilla puede instalarse sin empotrar o montarse en la pared utilizando el soporte de pared
69-2148EFS—01 54Instrucciones de InstalaciónSolución de problemasSe escucha un “tono” en la modalidad de memorización...• El pulsador que está progra
55 69-2148EFS—01RCWL330ALa campanilla no suena...• Verifique la posición del interruptor de la campanilla.• Verifique que el control de volumen no
69-2148EFS—01 56Instrucciones de InstalaciónEspecificación Campanilla Pulsador del timbreTemperatura de funcio-namientode 32 °F a 104 °F de 0 °C a +4
57 69-2148EFS—01RCWL330ADesecho y reciclajeLas baterías y los desechos procedentes de productos eléctricos no deben colocarse con los residuos domé
Installation Instructions69-2148EFS—01 4Install the Chime BatteriesTo remove the chime battery cover, press at point C and slide the cover back, then
Honeywell International Inc.ACS, Environmental and Combustion Controls1985 Douglas Drive, Golden Valley, MN 55422www.honeywell.comImpreso en los EE. U
RCWL330A 5 69-2148EFS—01Switch PositionsMute with flash on To keep the flash on and turn the sound off, set switch (D) to posi-tion 1.Flash off with
Installation Instructions69-2148EFS—01 6Sliding WindowRelease the catch (E) and slide open the window.M27271E23156Fig. 5Shown with number icon strips
RCWL330A 7 69-2148EFS—01Volume ControlThe volume control is behind the sliding window on the front of the chime. Initially, set the control to mid-
Related products and manuals for Furniture Honeywell RCWL330A


 (1 pages)
(1 pages)
(1 pages)
(1 pages)
(1 pages)
© 2020, manymanuals.com. All rights reserved. | 1.707 s |
 Manymanuals.com
 Manymanuals.de
 Manymanuals.fr
 Manymanuals.it
 Manymanuals.pl
 Manymanuals.cz
 Manymanuals.es
 Manymanuals-pt.com
Comments to this Manuals